This is one of the most popular dishes in our house. The pizza dough rolls out to make a thin crispy base and I love the tomato base sauce so much I add it to lots of other dishes also.
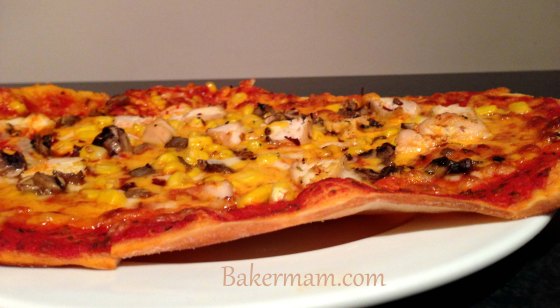
Chicken, Mushroom and Sweetcorn Pizza
I make this with Zoe and she loves it! particularly the wet ingredients, she thinks the yeast and sugar falling through the water looks like a snow globe. I recommend this recipe for parents of the fussy eaters because Zoe would eat any topping as long as she made it herself.
The pizza dough is from Jamie Oliver, the tomato base sauce is my own design and the toppings are whatever you desire!
Ingredients:
For the Dough:
- 400g strong white bread flour
- 100g finely ground semolina flour
- 1/2 a teaspoon of fine sea salt ( I use table salt and it still tastes wonderful)
- 7 g dried yeast sachets
- 1/2 a tablespoon of golden caster sugar
- 2 tablespoons extra virgin olive oil
- 325 ml lukewarm water
For the sauce:
- 300ml passata
- 1/2 a teaspoon of basil
- teaspoon of Oregano
- teaspoon of parsley
- teaspoon garlic purée
- generous pinch of black pepper
- pinch of onion salt
Now, Jamie Oliver’s recipe is for a larger quantity and slightly more detailed as I make mine the lazy way with a kitchen mixing machine but it is so much easier! If you don’t have one, the kneading part will have to be done by hand. This recipe will easily make 4 dinner plate sized pizzas.
Method:
First, add the sugar, yeast and olive oil to the lukewarm water and leave it to mix.
Next, sieve the flour, semolina and salt into a large mixing bowl and make a well in the centre, add the water mixture. Then using the dough hook, knead the dough until it has mixed into smooth, springy dough. Flour your hands and shape the dough into a ball sieving flour all around it so it is no longer sticking to the bowl. Cover the bowl with a clean tea-towel and leave to prove for 1hr, it should double in size.
Place the dough on a flour-dusted surface and knead it around a bit to push the air out with your hands. You can either use it immediately, or keep it, generously wrapped in cling-film, in the fridge (or freezer) until required.
If using straight away, divide the dough up into the same amount of balls as you want pizzas. I use about 160g per dough ball to make a pizza that would be a dinner plate size and approx 100g to make the kids’ pizzas.
The Sauce:
I tend to go with my gut when making this rather than religiously measuring all the ingredients so the measurements are just a guide, if you want to add or subtract from it, go ahead!
Pour the passata into a jug and add the garlic, basil, oregano, parsley, black pepper, onion salt and mix it all together with a hand whisk.
Preheat the oven to 250°C
Roll out the dough on a floured surface and when it is at the required size, cut a piece of tin foil that is a little larger than the pizza itself, brush with olive oil and sprinkle with semolina, then place the pizza base on top.
Spoon a little of the sauce onto the top of the pizza base and spread evenly. I love this sauce so much I spoon as much as the dough can take.
Add a handful of grated cheddar cheese and another of grated mozzarella and your preferred toppings. Remember some topping may need to be cooked in advance.
Place the pizza (still on the tinfoil) in the oven and cook for approx 8 minutes.
Some popular topping here are:
- Chicken, tomatoes and Sweetcorn
- Chicken and Mushroom
- Sausage and Mushroom
- Sausage, Red Pepper, Jalapeño Peppers, Chilli Oil
- Chicken and Prawns